Expected Workflow on a Partner Side
1. Create the user in X-Faces service
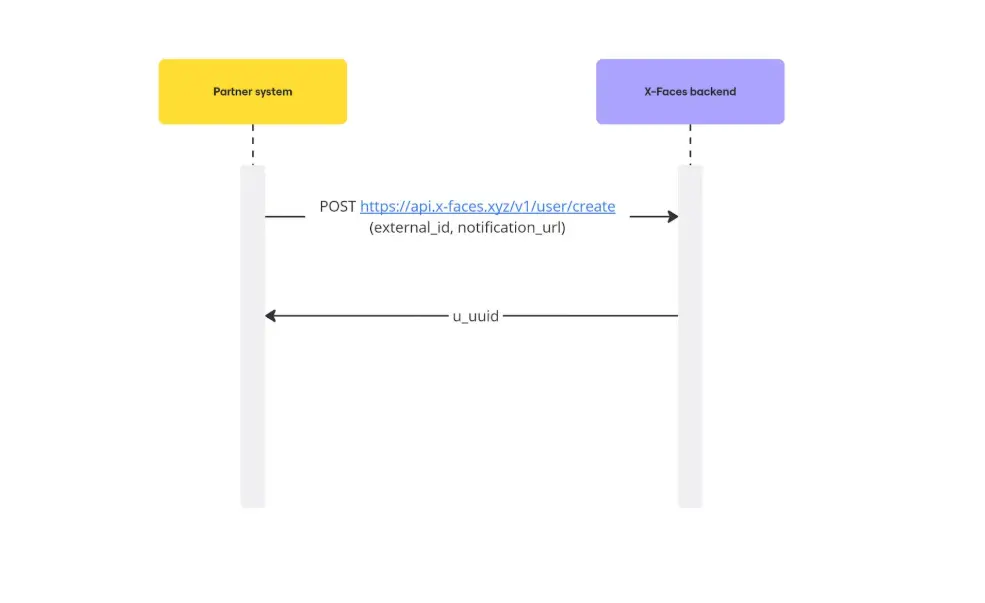
Section titled “1. Create the user in X-Faces service”Endpoint: POST https://api.x-faces.xyz/v1/user/create
Description: Creates a new user and returns a unique u_uuid.
Request Body Example
{ "external_id": "your_internal_user_id", "notification_url": "https://your-system.com/notify"}Response
{ "id": "generated_user_uuid"}id: Unique user identifier assigned by X-Faces. This is required for all further API calls.
2. User Verification Process
Section titled “2. User Verification Process”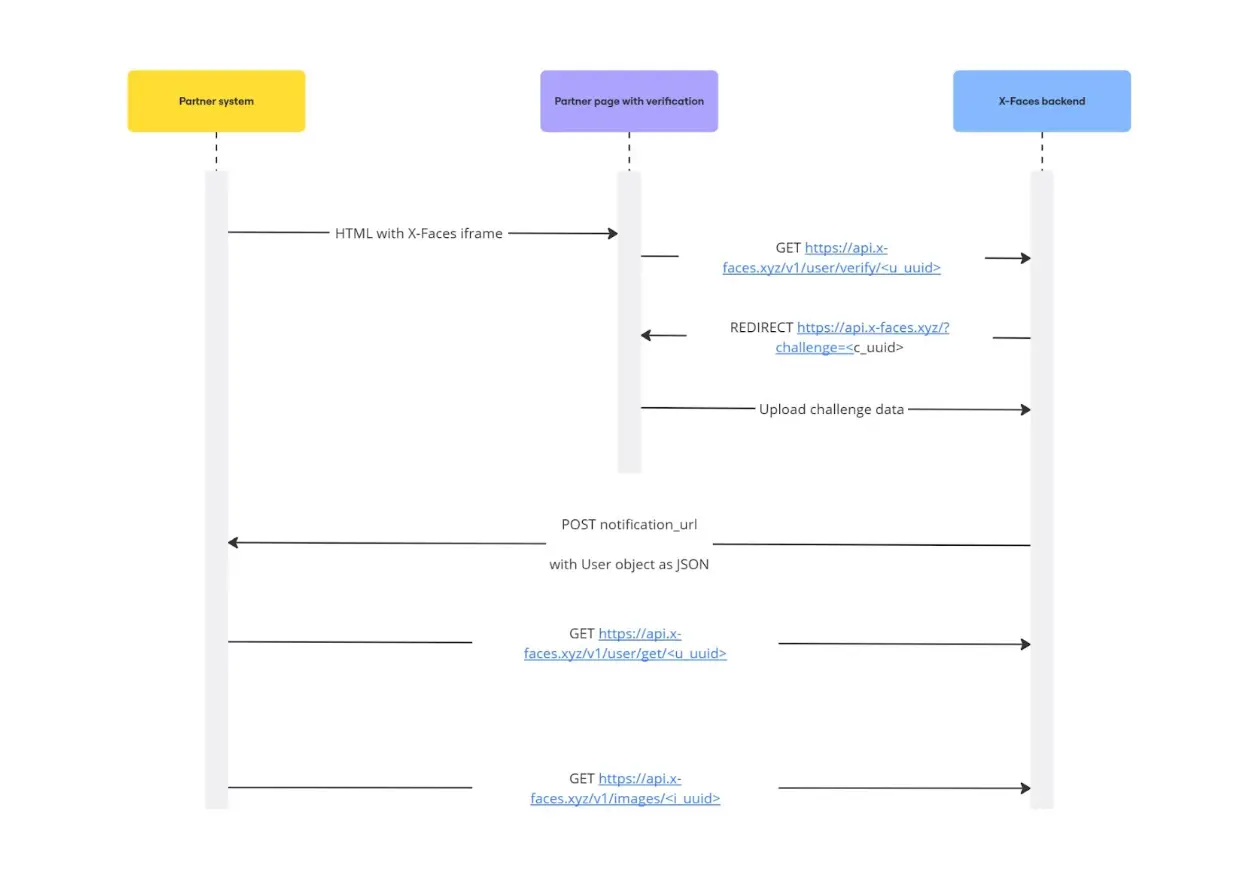
🔹 Full Flow
Section titled “🔹 Full Flow”-
Render Verification Page
The partner system generates an HTML page containing an embedded X-Faces iframe:- This iframe will load the verification UI for the end-user.
-
Initialize Verification Session
The iframe (or embedded client) sends aGETrequest to initialize the verification process:Endpoint:
GET https://api.x-faces.xyz/v1/user/verify/<u_uuid>Description: This request prepares a new verification session for the user identified by
u_uuid. -
Redirect to Challenge
The user is redirected to the actual verification interface:https://api.x-faces.xyz/?challenge=<c_uuid>c_uuidis the challenge session ID generated on verification session start.
-
Complete Verification
The user completes the challenge (e.g., face scan, ID upload, etc.).- All collected data is uploaded to the X-Faces backend.
-
Receive Callback Notification
After processing, X-Faces sends aPOSTrequest to the partner’snotification_url. -
Optional: Fetch User Info
The partner system can fetch additional user data via:GET https://api.x-faces.xyz/v1/user/get/<u_uuid> -
Optional: Fetch User Images
If needed, the partner can fetch associated images:GET https://api.x-faces.xyz/v1/images/<i_uuid>- This can include face images, document scans, etc.